
Honda Engine Codes – P1456
What it means: OBD-II code P1456 represents a problem with the EVAP control system on your Honda. The EVAP control system on your Honda temporarily stores fuel vapors from the fuel tank in a canister to stop it from escaping into the atmosphere.
What is the EVAP System?
The EVAP system in a Honda vehicle plays a critical role in controlling emissions. It prevents fuel vapors from escaping into the atmosphere by temporarily storing them in a canister. These vapors are later drawn into the engine via the intake manifold and burned during the combustion process. This system helps reduce environmental pollution and improves fuel efficiency.
Components of the EVAP System
- EVAP Canister: This component stores fuel vapors.
- Purge Valve: Controls the flow of vapors from the canister to the engine.
- Vent Valve: Allows fresh air into the canister to help purge the stored vapors.
- Fuel Tank: Stores the vehicle’s fuel and is a source of fuel vapors.
- Fuel Cap: Seals the fuel tank to prevent vapors from escaping.
Function of the EVAP System
The EVAP system is designed to capture and store fuel vapors. When conditions are right, the system purges these vapors into the engine to be burned. The Onboard Refueling Vapor Recovery (ORVR) system also stores vapors generated during refueling in the EVAP canister. The EVAP system uses a series of valves and sensors to detect leaks and ensure proper operation.
What Does Code P1456 Mean?
OBD-II code P1456 specifically indicates a problem with the EVAP control system on the fuel tank side. This means that there is a leak in the system that prevents it from maintaining the correct pressure. This can result in increased emissions and decreased fuel efficiency.
Symptoms of Code P1456
- Check Engine Light: The most common indicator of this issue is the illumination of the Check Engine Light.
- Fuel Smell: A noticeable fuel odor might indicate a leak in the EVAP system.
- Decreased Fuel Efficiency: Leaks in the EVAP system can lead to reduced fuel efficiency.
- Failed Emissions Test: If your vehicle fails an emissions test, it could be due to a problem with the EVAP system.
Common Causes of Code P1456
The P1456 code can be triggered by various issues related to the EVAP system. Understanding these causes can help in diagnosing and fixing the problem effectively.
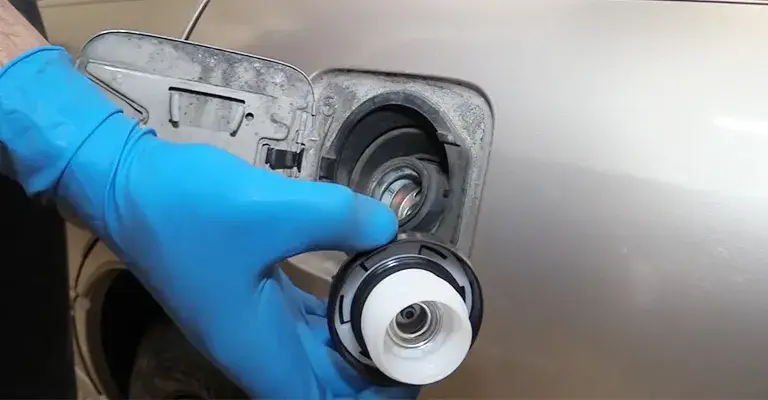
Missing or Damaged Fuel Cap
The fuel cap plays a crucial role in sealing the fuel system. If the cap is missing, damaged, or not properly secured, it can cause a leak in the EVAP system, triggering the P1456 code.
Incorrect Fuel Filler Cap
Using an incorrect fuel filler cap can also cause issues. Each vehicle model has a specific design for the fuel cap to ensure a proper seal. An incorrect cap may not fit properly, leading to a leak.
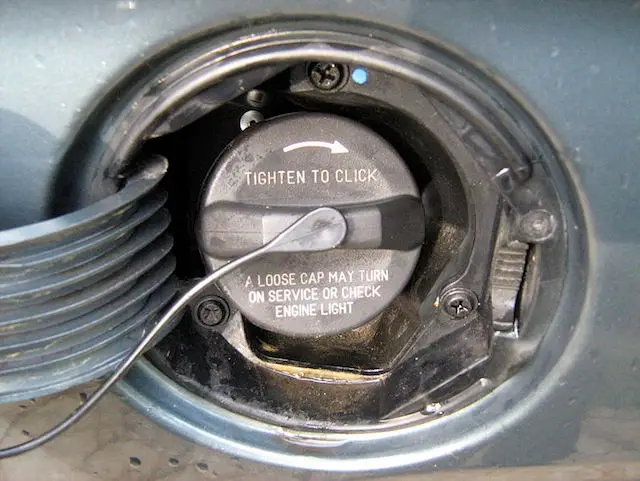
Open or Loose Fuel Filler Cap
An open or loosely secured fuel cap is a common cause of EVAP system leaks. This is often an easy fix, but it’s essential to ensure the cap is tightened correctly after refueling.
Contaminants in the Fuel Filler Cap
Dirt, debris, or other contaminants in the fuel filler cap can prevent it from sealing properly. This can lead to a leak in the EVAP system.
Faulty EVAP Canister or Valves
A damaged EVAP canister or faulty purge and vent valves can also cause the P1456 code. These components are integral to the proper functioning of the EVAP system, and any malfunction can lead to leaks.
Diagnosing and Fixing Code P1456
Diagnosing and fixing the P1456 code can often be straightforward, especially if the issue is related to the fuel cap. Here’s a step-by-step guide to help you address this problem.
Step 1: Visual Inspection
Start with a visual inspection of the fuel cap. Ensure that it is present, properly secured, and in good condition. Check for any visible damage or signs of wear.
Step 2: Reset the Code
After the visual inspection, reset the code using an OBD-II scanner. This will help you determine if the issue was a temporary glitch or if further troubleshooting is needed.
Step 3: Verify the Correct Fuel Cap
Ensure that you are using the correct fuel cap for your vehicle. Refer to the owner’s manual or consult with a professional to verify this.
Step 4: Clean the Fuel Cap and Seal
Clean the fuel cap and the sealing area to remove any dirt or debris that might prevent a proper seal. This can often resolve minor issues related to the P1456 code.
Step 5: Inspect the EVAP System
If the code returns after resetting, inspect the EVAP system components. Check the EVAP canister, purge valve, and vent valve for any signs of damage or malfunction.
Step 6: Professional Diagnosis
If you are unable to resolve the issue through these steps, it may be necessary to seek professional assistance. A trained technician can perform a more thorough diagnosis using advanced tools and techniques.
Preventing Future Issues
Maintaining the EVAP system is crucial for preventing future issues and ensuring your vehicle runs efficiently. Here are some tips to help you keep the system in good condition.
Regular Maintenance
Perform regular maintenance on your vehicle, including checking and replacing the fuel cap as needed. Regular inspections can help identify potential problems before they become serious.
Use the Correct Fuel Cap
Always use the correct fuel cap for your vehicle. An incorrect or aftermarket cap might not provide a proper seal, leading to EVAP system leaks.
Proper Refueling Practices
Ensure that the fuel cap is properly secured after refueling. A loose or improperly tightened cap is a common cause of EVAP system leaks.
Regular Inspections
Have your vehicle’s EVAP system inspected regularly by a professional. This can help identify and address any issues before they trigger a trouble code.
Conclusion
The Honda engine code P1456 indicates a leak in the Evaporative Emissions Control (EVAP) system on the fuel tank side. While this issue can seem daunting, it is often a straightforward fix, especially if the problem is related to the fuel cap. By understanding the common causes and following the steps outlined in this article, you can effectively diagnose and address this issue.
Remember, while this guide provides a comprehensive overview, it is always recommended to consult with a professional before undertaking major repairs. Proper maintenance and timely inspections can help prevent future issues and keep your Honda running smoothly.
For more detailed instructions or alternative methods to retrieve your radio code, you can visit Radio Unlocked. This resource provides a straightforward process for obtaining the code you need to unlock your radio, ensuring that you have all the necessary tools to maintain and enjoy your Honda vehicle.